Showing posts with label step by step. Show all posts

Thursday, 29 January 2015

Animation Blog - The final animation

After over 800 frames, a lot of work and dedication, re-modelling 'Roxanne' and 'Royston' we final have a final animation. Once we had taken all the frames we needed and put the sound in were it would fit. It was last minute that we decided to add the music 'Roxanne' by The Police as it was missing something by putting in this music it made our story come more to life.

There is a certain part of the song which we believed fit in well with our story that is why there is only a certain part of the song. This part of the song was:

"Roxanne you don't have to wear that dress tonight, walk the streets for money, you don't care if it's wrong or right"

Just with this line in the animation, it made more sense of our animation and was very apt. To add this song in, we had to record it from our mobile phones on a application called audacity, which we then saved in it and out it on to Zu3D. The sound affects that we used on the animation  come from YouTube were we recorded them off our phones then straight on to Zu3D.

This picture is from the final scene, this is showing how far 'Roxanne' has come from the beginning scene.

Animation Blog - Step Five

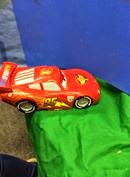
To make animation come to life there was certain objects that we needed to use that we wouldn't be able to make out of clay, the main objects that we use were two toy cars, trying to make these out clay was impossible and would have been very time consuming. The reason why we used two toy cars was to get the impression that it was two different people and 'Roxanne' was involved in even though the first car the person that was in it never showed their identity.


The other main element to make our animation come to life was the sound, we added in sound effects, when she was walking, also when the cars were driving we had the sound effect of a car driving and the horn tooting. We put 'Roxanne' by The Police at the beginning of the animation and at the end.


Animation Blog - Step Three


To start off the animation we needed to have set our scenes up and get the camera in place. To make sure that the camera wouldn’t move we used blue tac to keep it in place, this would make it easier for us. We couldn’t make all of our props so we did have two toy cars that we incorporated in different scenes. While making the scenes we did struggle with ‘Roxanne’ and ‘Royston’ as they were both made out of clay, when we moved them a lot they tended to break especially when we had to make ‘Roxanne’ sit down, so after certain scenes we did have to either mould them back together or take them apart and start again.
 

As the scenes went on, we were thinking of certain scenes off the top of our heads that we wanted to incorporate that we thought would be an better idea then what we had already discussed and looking back at the animation now it think we were right. Throughout the animation, we wanted to show the audience of ‘Roxanne’ moving from scene to scene to make it look like days were passing to make it look like we were looking at ‘Roxanne’s’ life for longer than just a day.

Animation blog - Step Two


Stage two of our stop-motion animation

Once Tara and I had decided our topic for our animation we needed to think about making our characters so we could make our stop – motion animation come to life. We both decided that it would be best if used play dough/clay so when moving our characters in the animation it would be easier to move and adjust them. At the beginning, we started off with a female character, she was the main character and we named her Roxanne, as we worked through our animation we added in a second character, this character was male and we named him Royston. When it came to making the cast and the props, we decided that I would make the characters and that Tara would make the props like the wheelie bin and black bags.

 
While we were making the characters we also had to think of the plot and the props that we would need to make animation more real. We decided that the story would start off with showing a typical day in ‘Roxanne’s’ life, which would include ‘looking’ for work, drinking and sleeping on the streets down a lane. We knew that we couldn’t just do two minutes of ‘Roxanne’ so this was when we incorporated ‘Royston’. ‘Royston’ would find ‘Roxanne’ sleeping on the streets and want to help her build her life back and get on the straight and narrow. The final scene of stop-motion animation would be showing ‘Roxanne’ over her addiction, and living her life with her new found hobby gardening. The message that we were trying to get across was that everyone needs help once in a while, there is help out and no one is on their own.


Tuesday, 4 November 2014

My not so great thaumatrope!!!

So as a pretty creative person I thought that when I got given the task to create my own thaumatrope I would do a pretty good job.... Oh how wrong I was. I decided that I wouldn't follow any instructions and try and do it myself, what a bad idea. Even though I was extremely proud of my drawings not happy that I buggered it completely but I still did step by step pictures of my own.


What went wrong?
I think the things that went wrong were my circle was too big, the wholes that I made in the side weren't in the centre and my pictures on both sides weren't level.